We frequently use stock music in our work. Whether it’s for an event-based video or web-only release, music plays a vital role in enhancing emotion, connecting ideas, facilitating narrative flow and adding punch. Ideally, we’d have the time and budget to have original music composed for every project, but often stock music libraries provide the convenience and budget-minded tracks we need. Over the years we’ve found some great options for music and have honed an approach we feel results in engaging, strategic use of music in our videos. Here’s our guide for how to best use music libraries in your video content creation (plus a 10% discount offer for Soundstripe at the end.)
Music for All Budget Levels
First decide which music library is going to fit your budget. There are two options: licensed and royalty-free. Licensed means purchasing a license to use a specific track in a specific video, and that track cannot be used in any other way. Royalty-free means purchasing the track once, but using it however you want going forward (aside from re-licensing it). The options for music libraries range from free to very expensive. The free options are usually more limited and lower quality than the paid ones, but value can still be found. While we haven’t personally used the no-budget options, we can vouch for all the other options. Here’s some music libraries to fit each budget level:
No-Budget
Audio Jungle – Not technically free, but has very low cost per-track options ($5-$15).
Pond5 – $15 and up to $89 per track.
Low-Budget
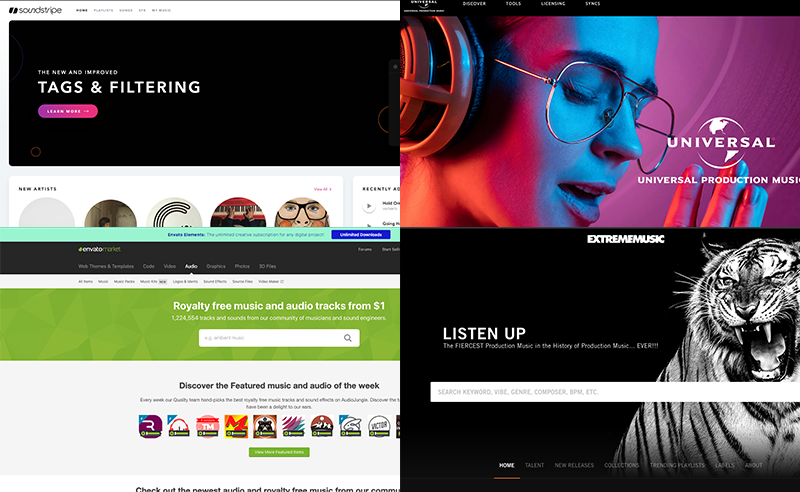
Soundstripe – This library is our personal favorite for low-budget, but honestly most budgets. With the monthly subscription option at $15 or annual subscription at $135, it’s a no-brainer. Soundstripe has a great user interface, options for music of different genres and easy licensing. They also update with new tracks very frequently, so after finding some great music for one video, there’s usually some new music a month later for a new project. Their music is broken down into thematic playlists such as weddings, corporate, acoustic, etc. and can be searched with a variety of filters.
Music Bed – we’ve used the Music Bed in the past and really liked their options. With a simple, easy to use interface and costing $9-$89 per month depending on your usage it’s another great option for those with a low budget.
Mid to High-Budget
Universal Production Music (Formerly Killer Tracks) – we used to license most of our music from here when it was still called Killer Tracks and before the advent of the cheaper subscription based options like Soundstripe and Music Bed. The tracks available here are very high quality, but come with a price. Depending on usage, licensing a track costs a few hundred dollars, or up to $1,000 for a blanket license (unlimited use of tracks in one video). They have a standard rate card, but we’ve found that you can negotiate down depending on your budget, especially with blanket licenses. This is the type of library that commercial producers will also be using, so you can find tracks you’ve heard on TV, or the opposite – hear a track used in your video on TV. Music is broken down by “label” as well as by genre.
Warner Chappell Production Music – we’ve used this library a few times in the past when we couldn’t find tracks we liked at Killer Tracks. It has a very similar feel and layout to Universal’s music library. Cost and licensing structure is also similar, ranging from a few hundred up to $1,000 depending on number of tracks, length of your video, and usage.
Extreme Music – As its name implies, this music library leans more extreme. We’ve used it in the past when we wanted something with an edgier sound. They have a pretty wide variety of music, but it does lean towards the rock, grunge, alternative, urban, electronic side. Cost is in a similar range to Universal and Warner.
How to Search a Music Library Efficiently
What good is a vast music library if you can’t find the tracks you want? Wasting hours searching for music can be fatiguing, with every track starting to blend together and sound the same. To avoid that, and perhaps carpal tunnel syndrome from endless scrolling, we’ve developed the following tips for searching music libraries:
1.) Keep it Under 30 Minutes – Don’t search music for more than 30 minutes at one time. After that your ears get tired, your brain slows down and every track starts to sound annoying. Dedicate a 30 minute block of time for searching music, and ignore everything else (email, co-workers, hunger).
2.) Have a Plan – Begin your search with a plan. Are you going to start with newly added tracks, go to a specific playlist, or an artist you’ve liked before? Find a good starting point and explore from there. Usually you’ll go on some tangents, but if you have a plan, you’ll keep coming back to that when you need to re-focus. I’ve found that once I like a specific track, searching other tracks from that sameartist is an easy way to find more tracks you’ll like. And as a bonus it can help your entire soundtrack feel a little more bespoke if all tracks come from the same artist.
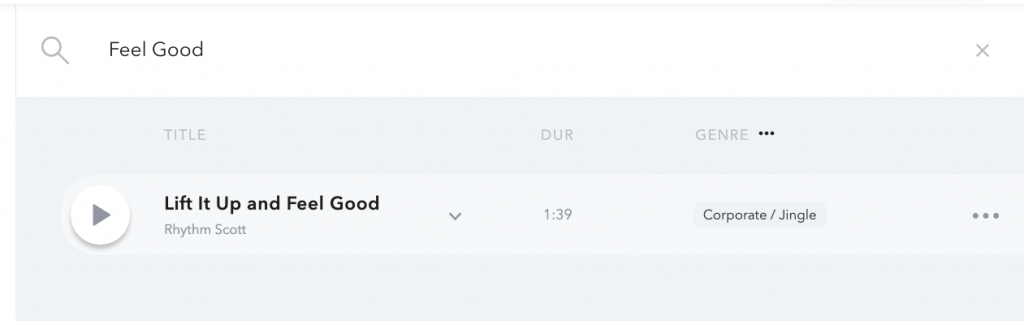
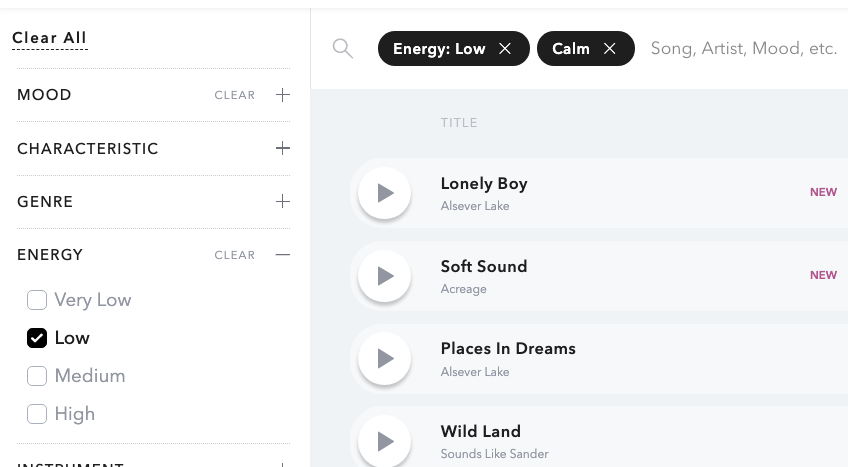
3.) Use Filters – All libraries have options for filtering your music search. Start filtering by vocal or instrumental. We almost never use a track that has vocals, so filtering only instrumental music immediately saves us time up front not having to sift through tracks with vocals. But you can go even more granular, picking a mood (somber, uplifting, inspirational), tempo, and even specific instruments. Usually you have some idea of what kinds of music or feel you’re looking for, so use the filters to help hone your search and make it more efficient.
4.) Go with your Gut/First Impression – Rarely have I nixed a track upon first listen and come back to it later and liked it. Usually within the first few seconds I know if a track is right or not. Stay with that gut feeling and don’t second-guess yourself too much. It will only lead to quicker ear fatigue and failure. Same goes for tracks you do like right away. Add them to your playlist or download them immediately to save time having to go back and find them again. Don’t forget to skip through to other parts of the track to see how it builds or changes. Sometimes the opening is intriguing, but the track changes halfway through and doesn’t work as well.
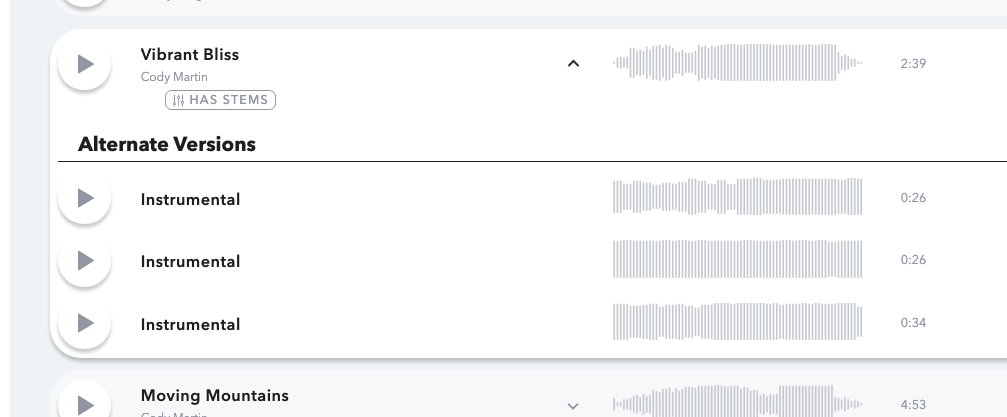
5.) Explore Alternate Versions – Nearly all of the paid libraries will offer alternate versions of each track. Whether it’s a different length (15, 30 second), instrumental vs. vocal, or a variant mix, all of the alternate options provide a different feel. There’s been many times when the original version of a track wasn’t working for me, but an alternate version version did. So don’t forget to listen to alternate versions of a song when you’re a little on the fence, because you might be surprised.
Auditioning Music in Your Cuts
Once you’ve honed your searching ability, begin downloading tracks to audition in your video. You should download more tracks than you will eventually need (eg. if you need three tracks, download six options). If you’ve only downloaded the exact number of tracks you need, you’ll have to go straight back to search the music library if one of the options doesn’t work, which slows the creative editing process. We like to audition music near the fine cut stage of a video. If you audition music too early (rough cut), then you may be wasting time on music that won’t get used because your cut can still change dramatically at this point. But if you wait too long to audition music, then you may be more reluctant to make edits to your video that help it work a little better with the tracks. Auditioning music can help you work out the rhythm of the edit at a stage where it’s still relatively easy to make changes, or help solidify the cadence of a montage. And if it turns out that none of your options worked, go back and start searching again. Remember tip #1 – set aside a dedicated period of time, but first give yourself a short break.
Customizing and Tweaking Tracks for your Edits
Once you’ve auditioned your tracks and found the ones that work best, it’s time to tweak and customize. It’s easy to spot those videos in which a track of music was simply dropped in and nothing adjusted. The musical shifts and transitions don’t line up with story or emotion and the track doesn’t conclude, it just fades out. If you want your video to sound and feel really polished, it’s imperative that you spend time customizing your music tracks in these key ways:
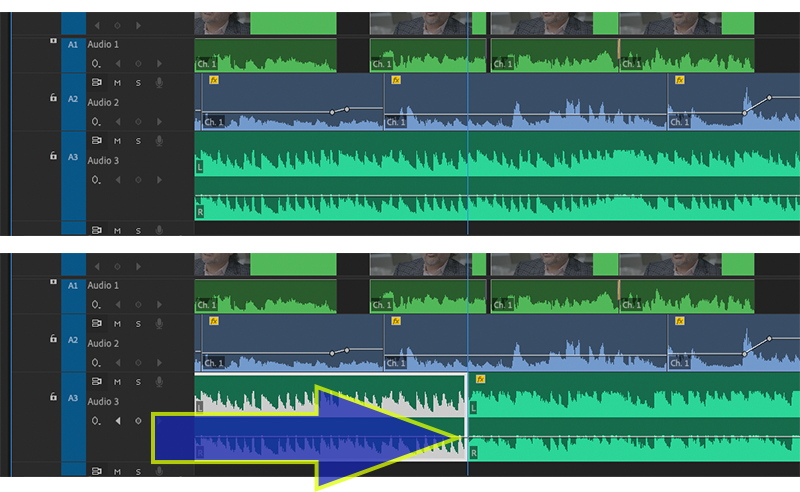
1.) Line up musical shifts with story or emotional moments – Most music tracks are dynamic and tell a story on their own, with shifts in tone, rhythm and instrumentation. Try to line up those shifts with moments in your video so that the music enhances your story and doesn’t function only as background music. Usually that means cutting up the track so that the first beat drop or appearance of an instrument lines up with a storytelling moment you’ve crafted. In the example below, the same video edit is shown twice. In the first image the music track is unedited, leaving an opportunity for dynamism on the table. In the second image the music is cut so that a different section of the track lines up with a story point.
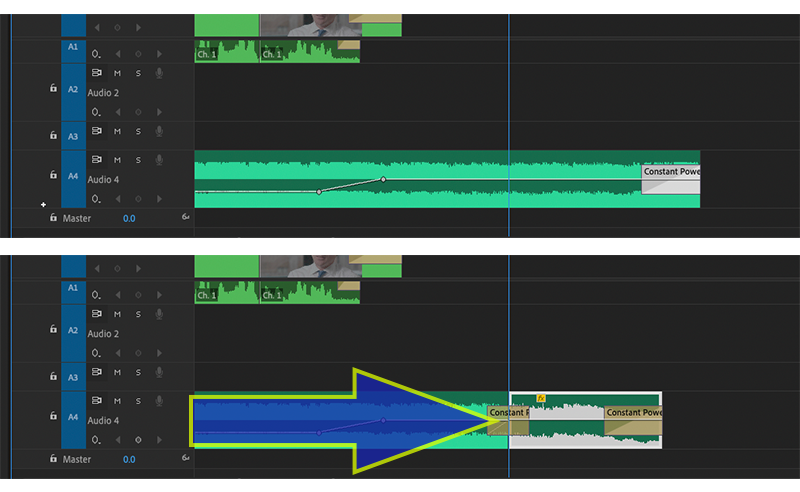
2.) End the track instead of fading it out – It’s much easier to simply fade out a music track than to put in the work to maintain its natural ending. But fading it out often leaves the song feeling unfinished, and in turn your story. It’s much better to edit the track in order to utilize the musical ending the artist created. There’s a few ways to go about this, but both require careful listening and lots of finessing. One way is to simply take the end of the track (final 5-10 seconds) and drop it where you need it. You’ll have to finesse it so that the rhythm lines up and it doesn’t sound out of place, but most of the time it’s a simple edit. A short crossfade of 4-8 frames can help smooth out any quirks. The other way to accomplish this is to drop the ending where you need it, then pull the track back much further so that the transition happens earlier in the video edit. Use this approach if your cut-in ending sounds too different from the rest of the track. For example, if the ending has big drums, but the section of music you are transitioning from has no drums, moving the transition point much further back will usually help the two pieces line up better. Bonus tip: make these transitions under other audio such as interview, voice over, or ambients. It’s much easier to hide these cuts when the viewer’s ears are being distracted by other sounds.
3.) Ride levels within the track
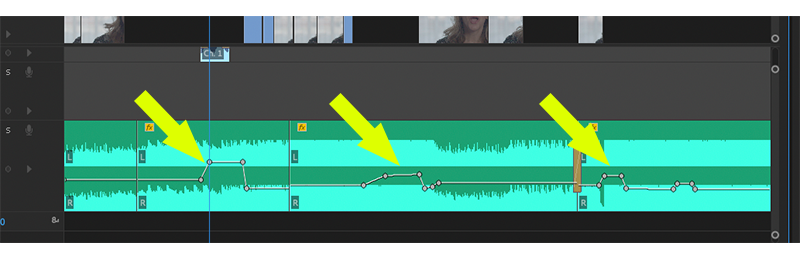
Don’t forget to ride the track levels throughout your edit. Don’t drop the track in and move on. Lower the levels during interview or voice over so that they are easily heard, then raise them again during a montage, b-roll scene or purely visual moment. This technique can also add emotional impact. If your music has a great transition point or swell, utilize that to your advantage by placing it strategically and raising the levels at that moment to add emotional power. In the example below, the levels are raised in-between interview audio on the first two arrows, and then raised again on the third arrow as the music hits a high point.
Good Luck – Plus 10% Off Soundstripe
Hopefully this was all helpful for you on your next journey searching for the perfect music for your video. If you’d like 10% off of your subscription for Soundstripe, our current preferred music library, please click here and use coupon code: eidolonfilms
What a great guide! I particularly like your tips for searching music libraries. With the increasing amount of large music libraries online, there is an overwhelming choice of music available that can often throw a filmmaker or video creator into a never-ending search for the perfect piece of music!
All the music libraries mentioned above are fantastic resources for filmmakers, but I would also like to recommend that creators look at independent libraries. A curated library can offer a more refined selection of music that is much easier to search. Also, the artist/composer tends to receive a better cut of the sync license so you will be supporting fellow creatives in their careers.
Another tip I would like to add is if you have a good idea of what type of music you need for your production but would like some guidance, do contact the music library directly. If they are a curated music library, they will know their composers and library personally and will be able to guide you in the right direction.